Easy Pumpkin Decor: Halloween Decorating
Want to add some flare to your Halloween decor? I’ve got a fun way to decorate your pumpkins without using a paintbrush or a carving kit. It only takes minutes and the best part is, it won’t break the bank.
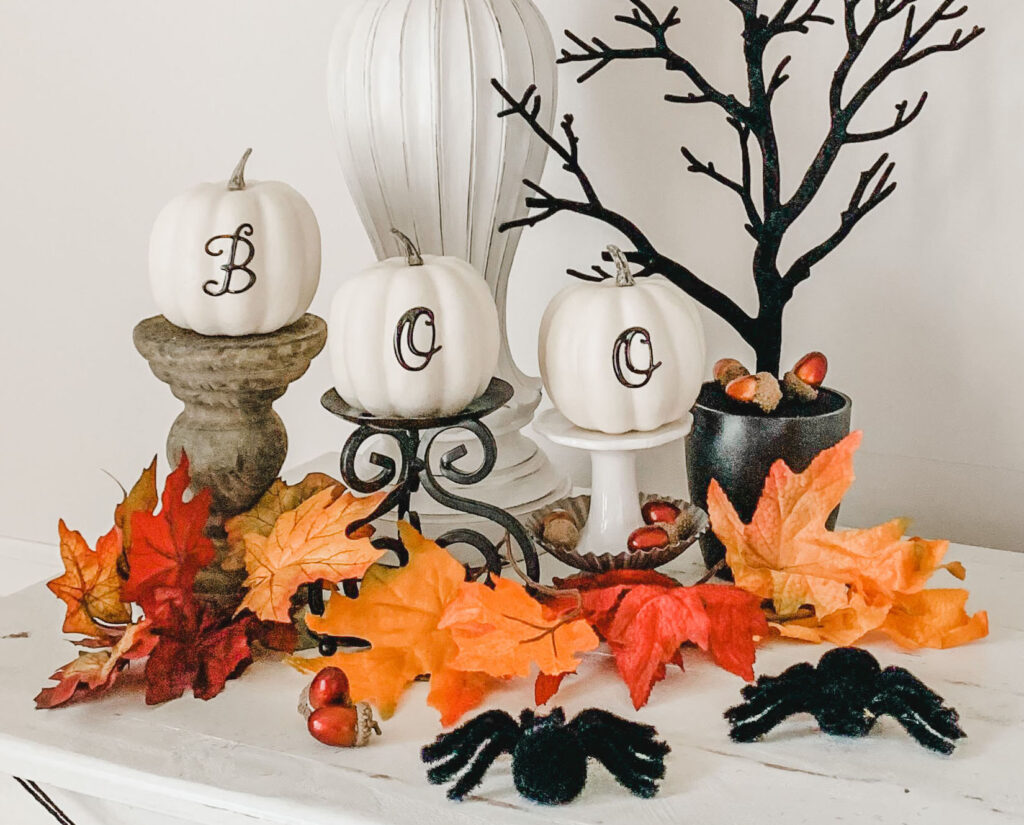
Table of contents
In fact, this pumpkin decorating project is so easy that it took me longer to find the supplies than it did to finish the design, and that includes clean up.
I used artificial pumpkins so I could decorate with them year after year but you’re welcome to use real pumpkins. Like the song says, “Ain’t nothing like the real thing baby!”
(Please note- article may contain affiliate links. Full disclosure at the end of post.)
SUPPLY LIST FOR YOUR EASY PUMPKIN DECOR PROJECT
Keep your eyes open for artificial pumpkins, even before the fall season rolls around. These pumpkins, especially the mini pumpkin variety packs, tend to sell out as soon as they hit the store shelves. Grab them as soon as you can.
- You can find artificial fall pumpkins at craft and variety stores including Hobby Lobby, Michaels, Old Time Pottery, and Dollar General. If you don’t want to wait for pumpkin season you can order them online anytime of year using these links: ORANGE PUMPKINS, WHITE PUMPKINS, BLUE PUMPKINS, or GREEN PUMPKINS (My mini pumpkins measure 3 1/4″ tall X 3 1/4″ wide, not including the stem, you can use any size you’d like)
- Assorted Pumpkins in a variety of sizes
- I used epoxy sticky letters for my pumpkin decor but I found this wasn’t the best choice. I recommend using vinyl lettering.
- VINYL LETTERING – You’ll be able to choose your font size and style at this link.
- LINKS TO CANDLESTICK HOLDERS
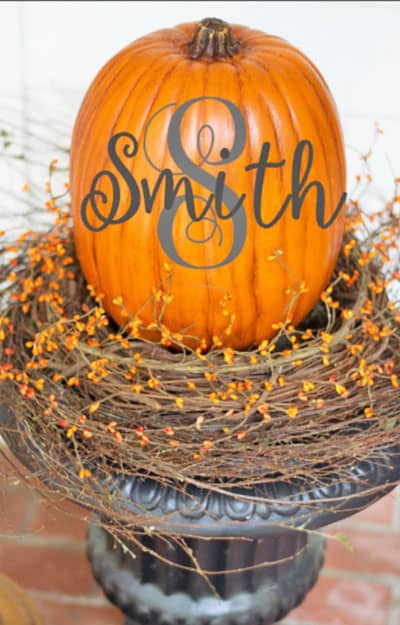
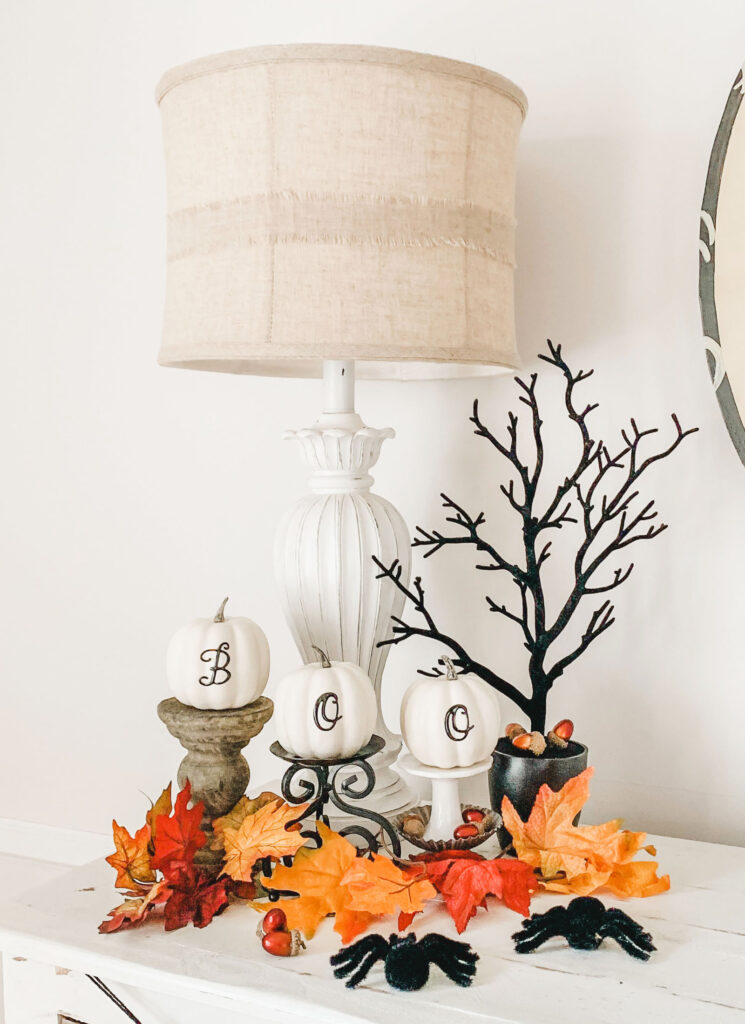
Porch Pumpkin Decorated with Vinyl Lettering
It’s a good idea to figure out where you’d like to put your pumpkin decorations before you begin. Do you want to use them on the front porch as outdoor decor? Or would you like to use them as a decorative accent inside your home? Maybe on your fireplace mantel or as a centerpiece on your table?
It’s totally up to you and honestly, these decorated pumpkins look great anywhere. Taking the extra time to plan this out will help you figure out what size pumpkins you need. If you need more ideas on decorating your home for Halloween, read The Easy Way to Style Your Home with Halloween Decorations.
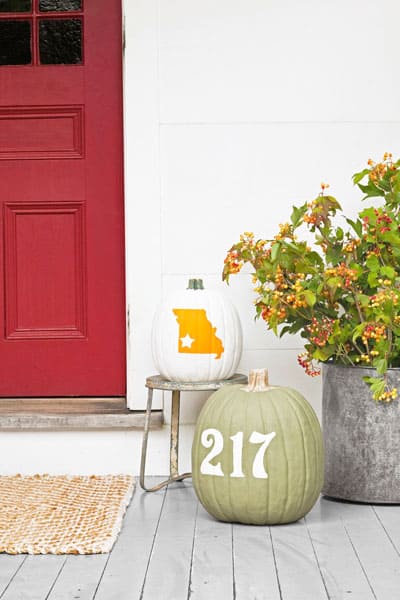
I used mini pumpkins for my project because I wanted to decorate the side table in my eat-in kitchen and I didn’t have the room to use full-sized pumpkins. I could have used orange but I already had artificial leaves in fall colors so I opted for white pumpkins for contrast.
Plan out what words or phrases you’d like to use to create your pretty pumpkins before purchasing. The last thing you want to do is get in the middle of decorating and find out you didn’t pick up enough pumpkins.
PREP YOUR PUMPKIN

Now that you’ve got your creative ideas flowing and your pumpkins and lettering in hand, let’s get to the fun stuff.
Wipe down the surface of your pumpkins with a wet rag and dry them off.
PUMPKIN DECOR PHRASES
Incorporate some of these great ideas for your pumpkins lettering:
- Boo
- Welcome
- Trick or Treat
- Happy Halloween
- Happy Fall
- Hello
- Hello Fall
- Give Thanks
- Hocus Pocus
- Thankful
LETTERING
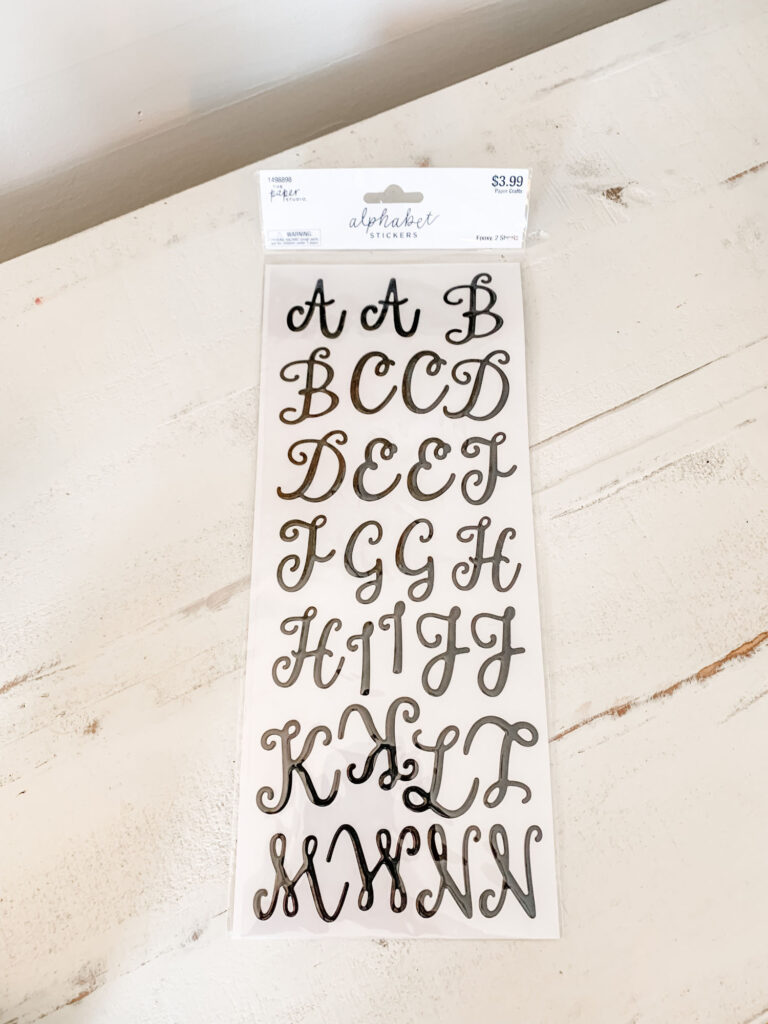
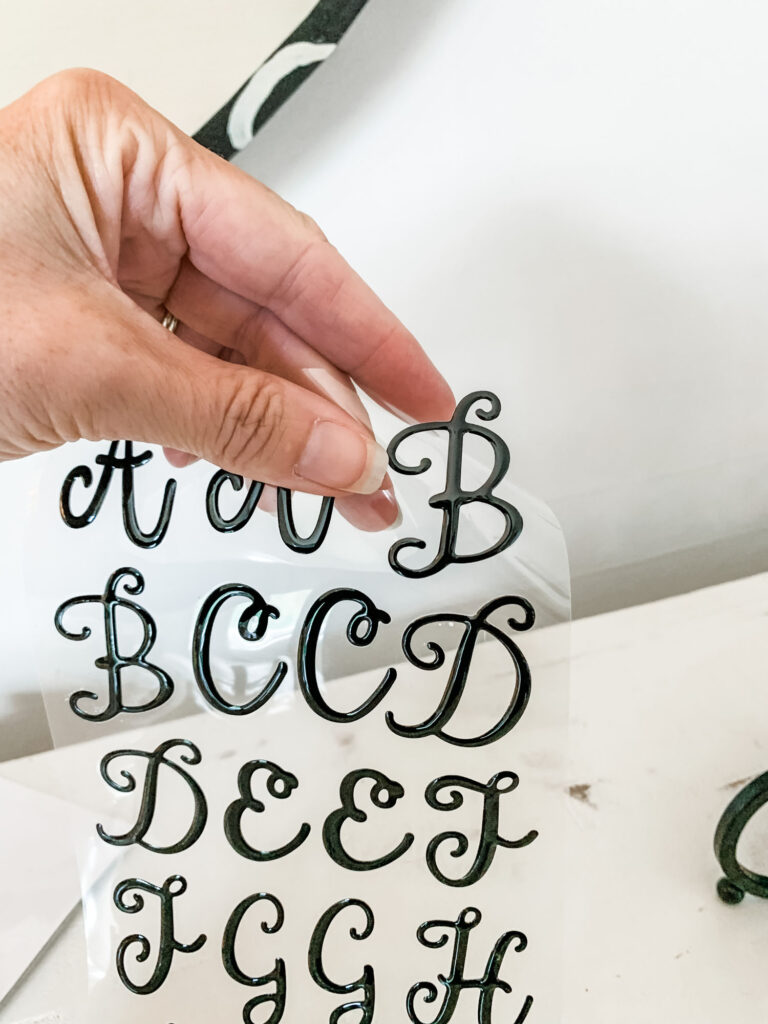
I used epoxy sticky letters for my pumpkin lettering, but I wouldn’t use this material again, vinyl lettering works much better.
I found the epoxy letters at Hobby Lobby but they’re very stiff. I had to hold the letters in the grooves of the pumpkin for a while to make them stick. Plus finding the script I wanted in the size I needed was quite the task.
If you use one letter on your pumpkin like the “B” in Boo, the lettering needs to be at least 1/2 the height of your pumpkin. If you use a phrase like Happy Halloween, the entire phrase needs to be at least half the height of your pumpkin.
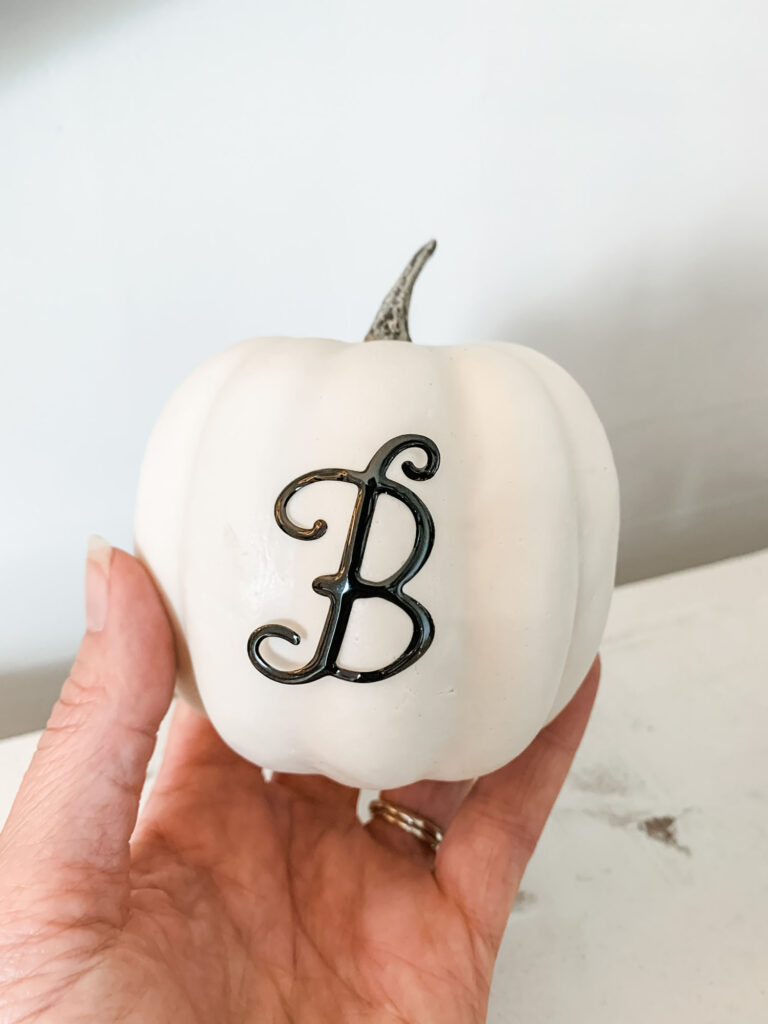
My pumpkins are 3 1/4″ tall and the lettering is 1 1/2″ tall. I could have used lettering up to 2″ (and would have if I could have located it). If you can’t decide on the font size, always go with the larger size, you won’t be disappointed. You can also use a Cricut or find someone who owns one for the vinyl lettering.
Simply remove the letter from the cellophane backing and stick it securely to the pumpkin.
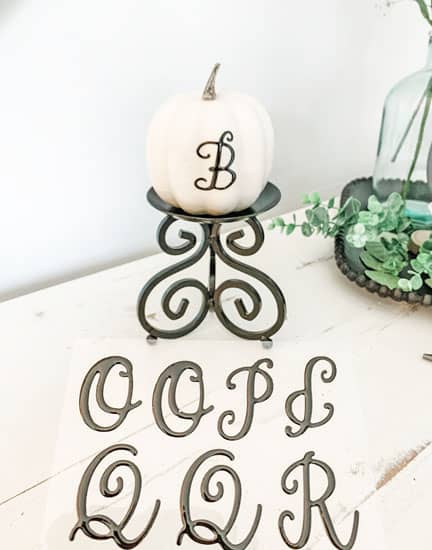
I put one letter on each white pumpkin but you may choose to put an entire word per pumpkin. No worries, there are no hard and fast pumpkin rules. Do what you think looks best.
It’s really simple, the two main things to remember are – to smooth the decal out over the grooves of the pumpkin and to make sure the middle section of the letter is in the middle of the pumpkin. You can measure it- I didn’t, I just eye-balled it.
Once you’ve finished the “B” you can move on to the O’s or you may decide to write something different- be creative – the sky’s the limit!
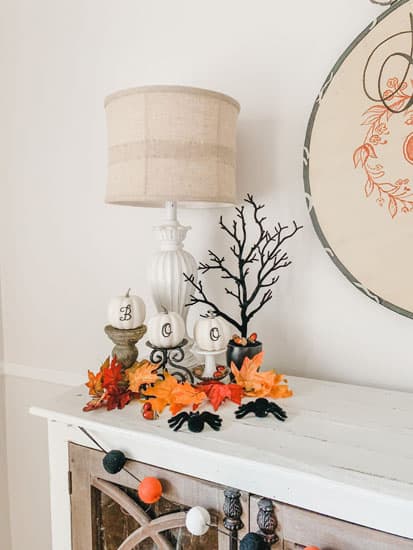
Once you’re done you’ll want to show your pumpkins off. The perfect way to display the pumpkins is to place them on candlestick holders. For interest, I placed mine on holders that were a little different from each other.
How would you decorate with your pumpkins?
I hope you enjoyed this easy pumpkin project.
I’d love to hear from you. Drop a comment in the section below or send me a photo- I promise it will make my day!
Happy Halloween Decorating!
Until Next Time-
Cherie
Related Articles:
Wait A Minute, It’s Thanksgiving Week?
The Unfortunate Thanksgiving Tablescape
5 Essentials to Decorate Your Farmhouse Christmas Mantel
Creative Basket Decor Ideas to Make Your Home Fabulous
15 Creative Decorating Ideas Using an Old Wooden Ladder
Disclosure
Please note that some links in this post are affiliate links. At NO ADDITIONAL COST TO YOU, I will earn a small commission on any purchases made.