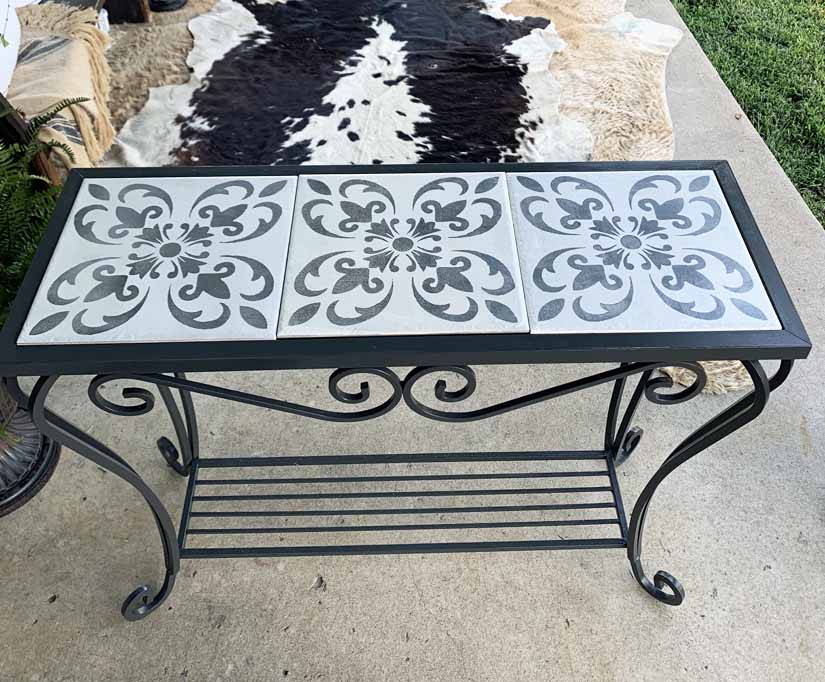
How To Stencil A Tile Table
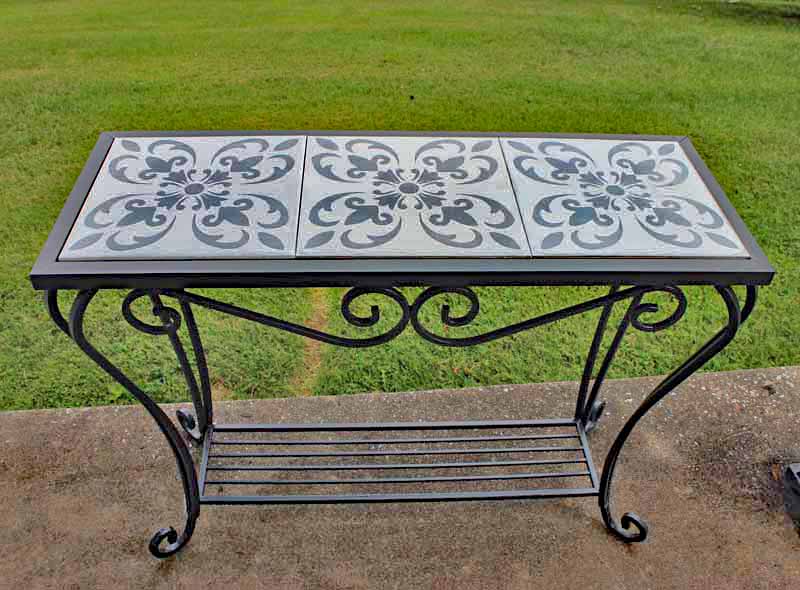
I love a good iron side table, they never go out of style. This table’s been in my house for years, it’s got great bones, but it was a boring brown color and it looked tired. I was ready for a change so I decided to stencil my tile table and bring it into the decade it was meant for!
(Please note- article may contain affiliate links. Full disclosure at the end of post.)
Supplies Needed to Stencil a Tile Table
- Enamel Paint for the Table – Sherwin Williams Iron Ore
- White Spray Paint for Tiles (Underneath Stenciling) – Krylon Satin Paint
- Shimmer Metallic Paint (optional) for Tiles – Rustoleum Peral Mist
- Metallic Paint for Stencil Design – Decor Art Ameri Deco 8 oz Tin Color
- Clear Coat Sealer – Krylon Clear Coat
- Sponge Roller and Tray
- Stencil (Stipple) Brush (Use either the sponge roller or stipple brush- not both)
- Stencil – 3-Piece Variety Stencil Pack
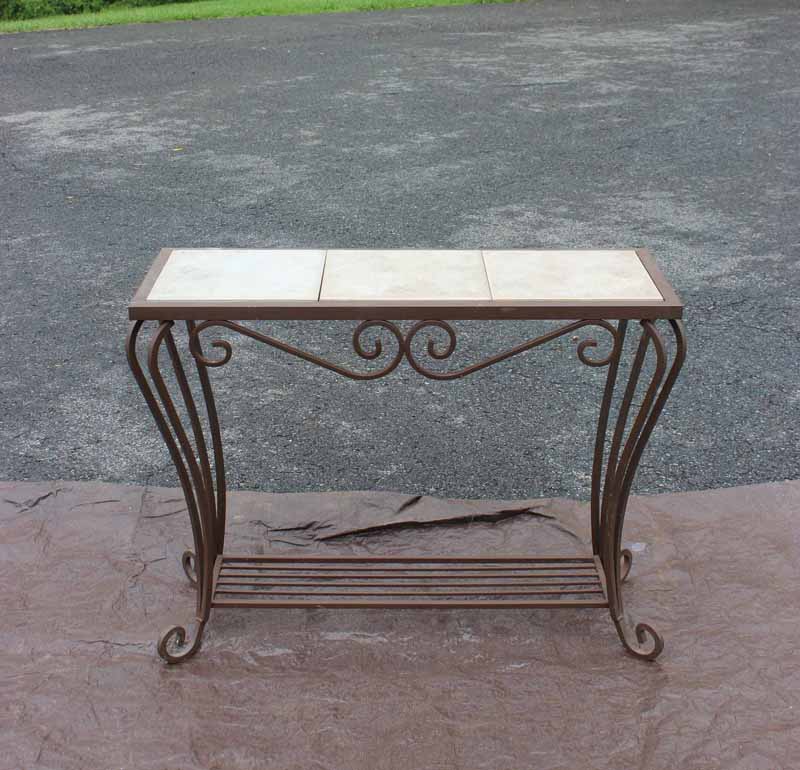
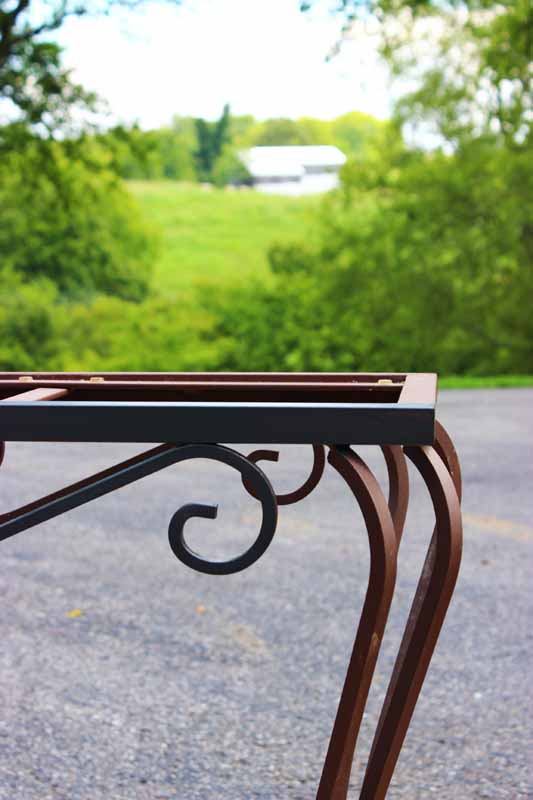
I went with a dark gray enamel paint (Sherwin Williams-Iron Ore). You can see the paint in progress -love this color! This paint was left over after using it on our fireplace mantel earlier in the year.
At first, I tried to paint with a brush and felt like I was getting nowhere fast. It was frustrating because the bristles of the brush kept wrapping around the iron. Then I realized that a sponge roller was the way to get the best coverage. I ended up using the regular brush for the tight spots.
Once the table was painted, my plan was to find the perfect decorative tiles for the top, but that didn’t work out. I had a tile design in mind and searched the internet and home stores but nothing was right. Most of the tiles were too small or weren’t the look I was going for. So what’s a girl to do? Of course, make her own design.
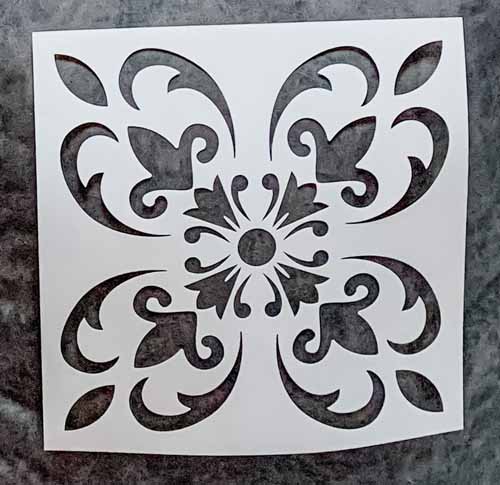
I’d love to say I free-handed a beautiful design on the tiles but….no, I found a cool stencil set on Amazon. I’d never stenciled before but luckily there was a “how-to” video on the Amazon site where I’d bought the set. The stencils came in a set of 3 and this is the one I chose.
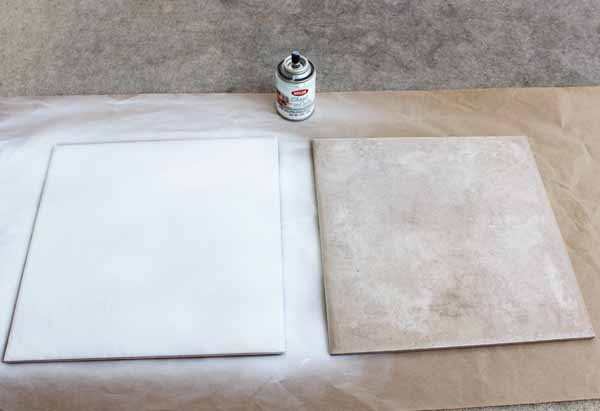
Prep the Tile
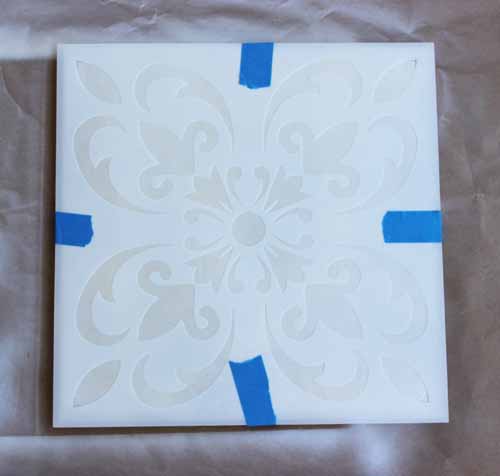
I wanted the tiles to have a white background so I sprayed them with enamel spray paint and added metallic white on top (optional) for a slight shimmery effect.
Then it was time to stencil. I chose a design that was the same size as the 12″ x 12″ tile. The Amazon video said to use spray adhesive on the stencil to hold it in place.
Don’t Do What I Did
Reluctantly I sprayed the adhesive on the tile but when I pulled the stencil up, the paint came along with it –oops!! I had wondered if that would happen and sure enough, it did. Moral of the story, trust your instincts.
I think it’s important for you to see mistakes I made along the way so you can avoid them.
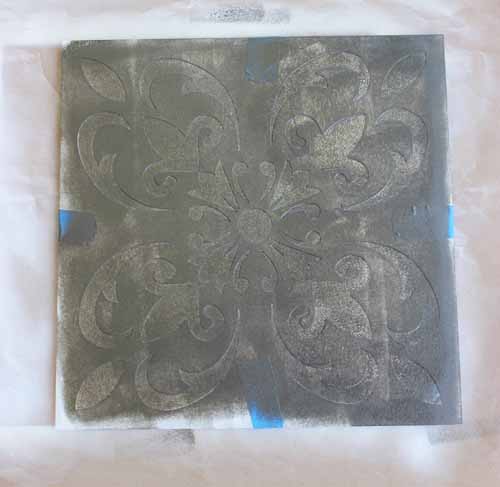
Check out the first stenciled tile – not pretty!! Ha! You can see all the little marks where the paint came off with the stencil. Also, the paint layer was too heavy and bled through, making the design splotchy.
I didn’t get a good photo because I was so frustrated -I laugh about it now!
I found that the key to stenciling is making sure you work with a light coat of paint. The heavier the paint layer, the messier the design will turn out.
Hold the Stencil in Place
Take 2. I scraped the top coat off the tile and repainted it. After the paint dried I laid the stencil on top and taped all four sides with painter’s tape to hold it in place.
Sponge Roller or Stipple Brush?
Now here’s where I may have made a different decision if I had known more about stenciling. I found that some people use a stipple brush to dab the paint on the stencil. Seems like this is an easier way to control how much paint you’re using. I’ll keep that in mind for my next stenciling project.
Anyway, I rolled the sponge roller in the paint and then onto a paper plate to get the excess paint off. You’ll need to make sure the paint is rolled evenly on the roller. Then I rolled over the stencil in a down and up motion, covering the entire stencil.
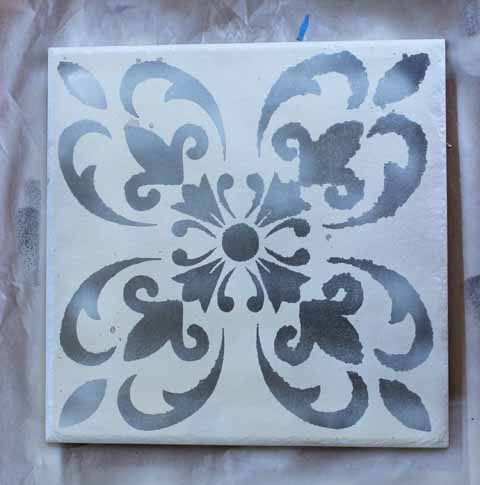
I repeated the process again and worked quickly so the paint wouldn’t bleed. I held my breath (literally!), took the tape off, peeled the stencil off and yippeee- it worked!! The design came out beautifully! After admiring my work- yes I admit I did, I worked on the other tiles in the same way.
Finishing Touches
After the tiles dried I sprayed a thin layer of Metallic Pearl Mist spray on top for the final shimmer (optional). As you can see I’m into the shimmer 🙂 Finally I sprayed a layer of clear coat to seal the paint.
Even though clear coat protects the tiles, I don’t recommend using the table outside. I’m afraid the design wouldn’t be able to survive the harsh elements.
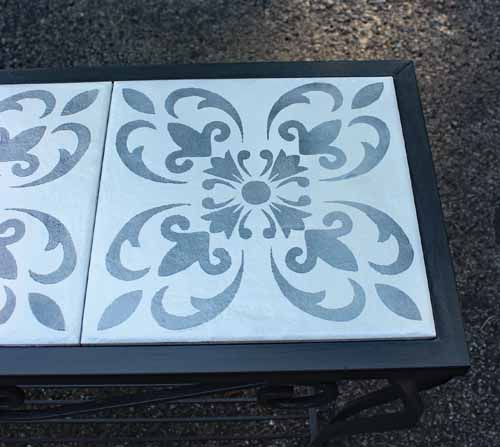
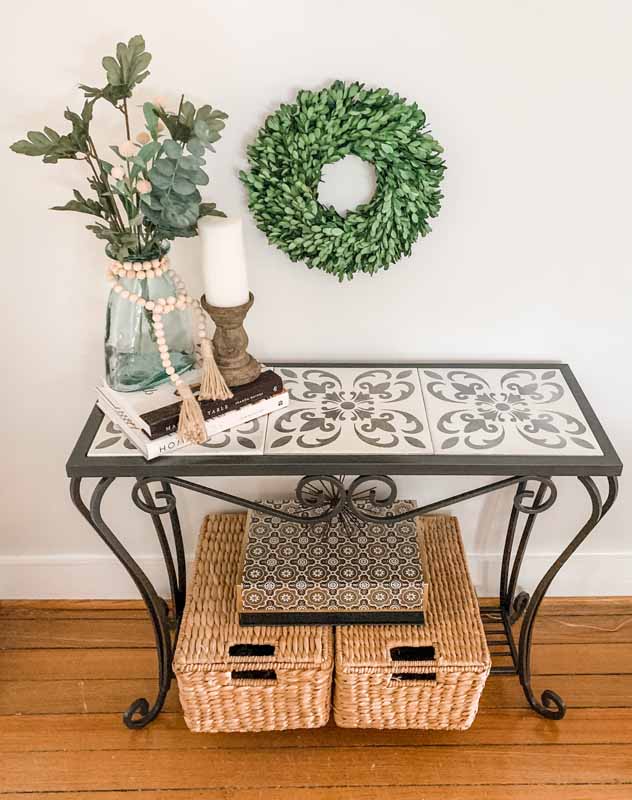
After the clear coat dried, I fit the tiles in place which completed the transformation. My ugly duckling had turned into a beautiful swan. The stenciled tile table was finally ready for display in my living room where it sits today.
I encourage you to try it – you may find a creative side you never knew existed.
It’s time to get started!
If you have questions or suggestions, I’d love to hear from you. If you decide to stencil your tile table, please send me a photo -reader photos are my favorite!
If you’re a fan of doing DIYs, you can also check out my post on How to Make a Pendant Light: Easy Step-by-Step Tutorial.
Until Next Time!!
-Cherie
Related Articles:
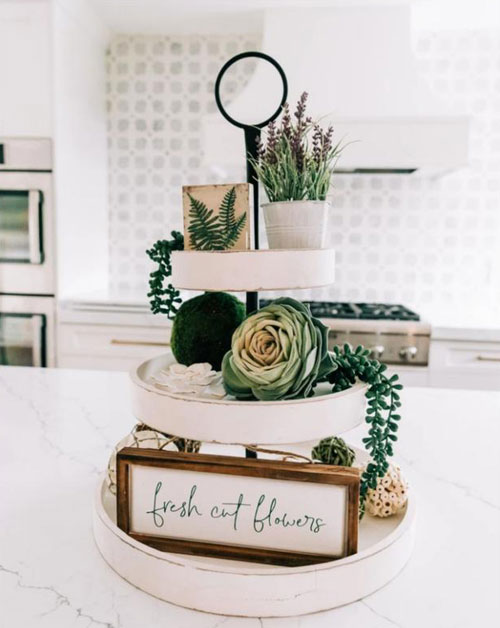
23 Stylish Centerpieces for Your Kitchen Table
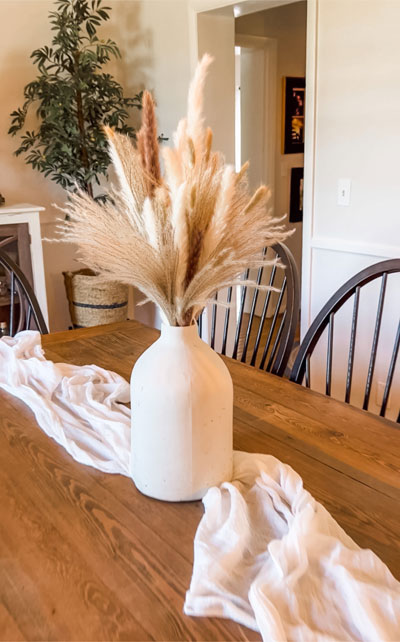
Decorate Your Vase With Pampas Grass: An Easy How To
15 Creative Decorating Ideas Using an Old Wooden Ladder
Cozy Ideas for Lighting Up Your Reading Nook
Great Ideas That Make Your Small Farmhouse Kitchen Modern and Beautiful
Disclosure
Please note that some links in this post are affiliate links. At NO ADDITIONAL COST TO YOU, I will earn a small commission on any purchases made.