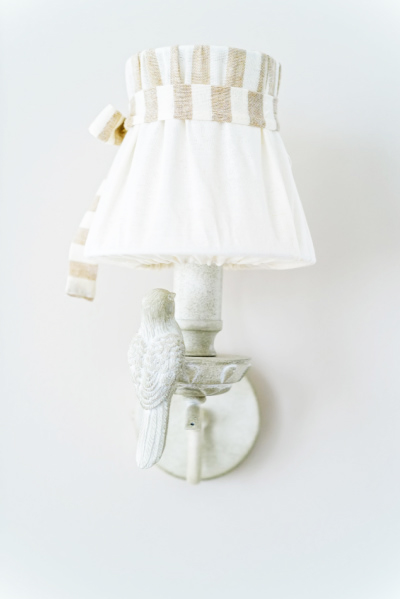
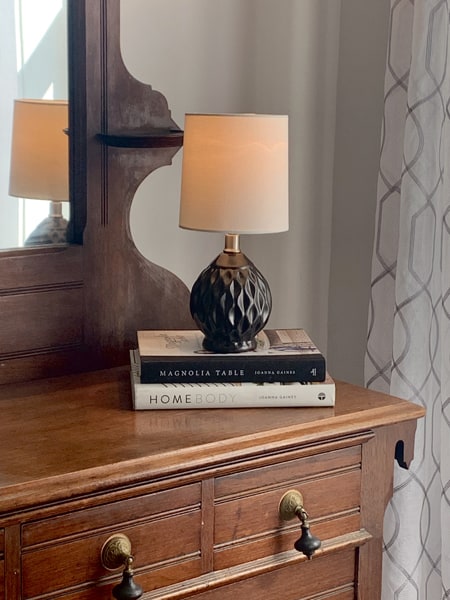
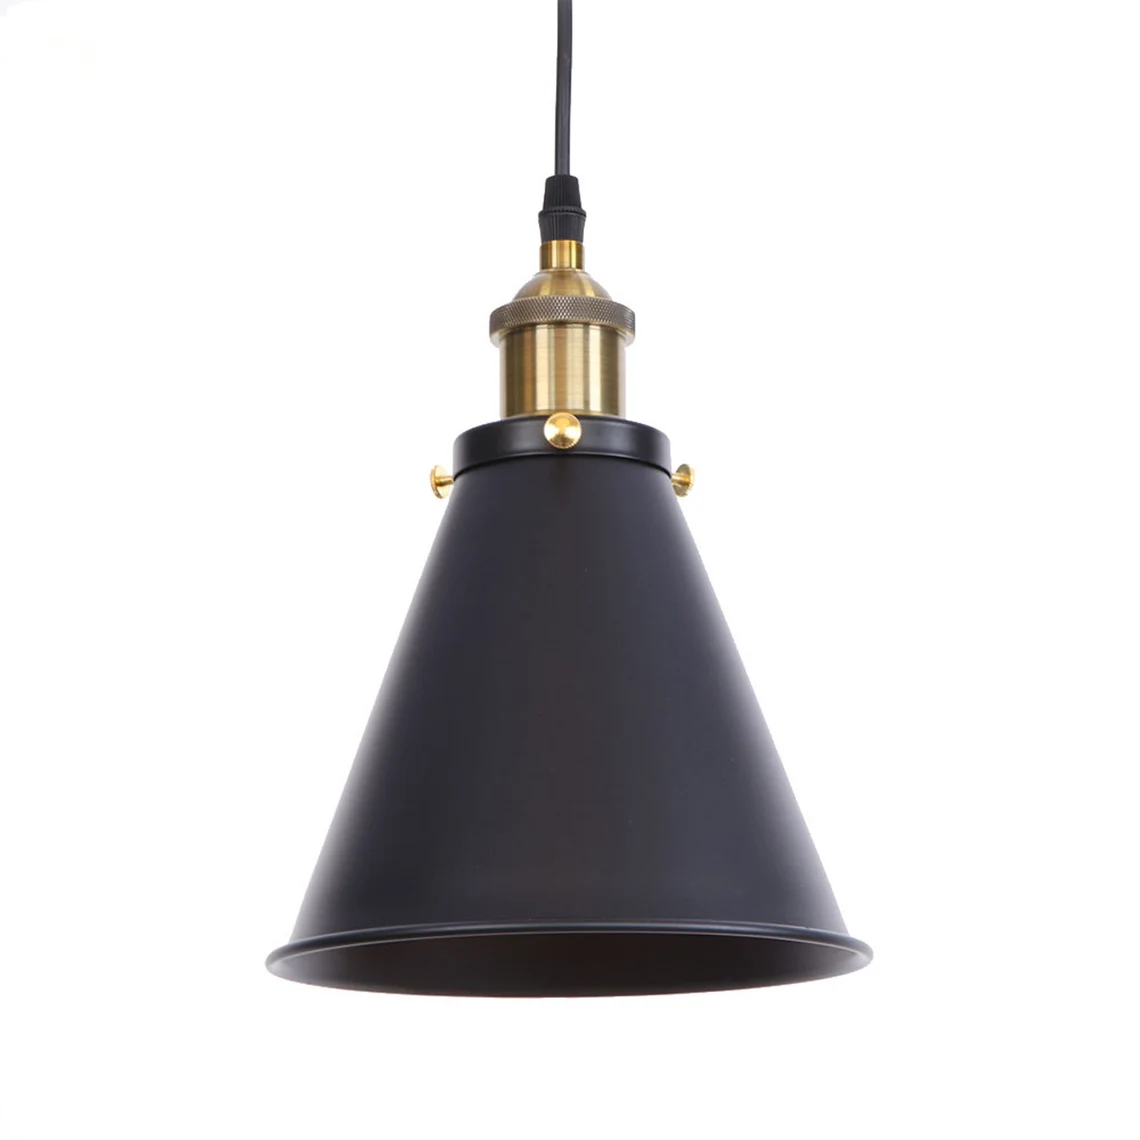
How to Swag a Light Fixture With a Cord or Chain
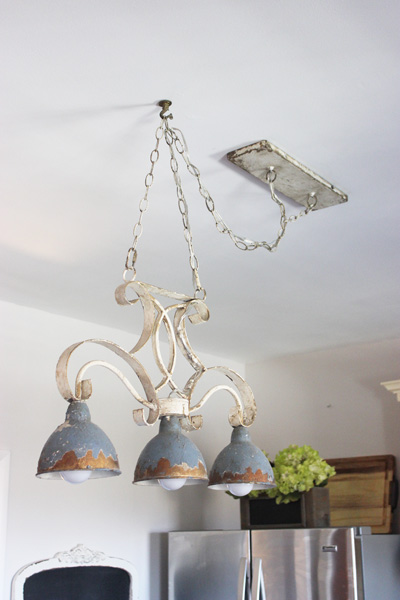
What do you do when you have a new chandelier or pendant light but the ceiling junction box is in the wrong spot? You hang the ceiling light and then swag it. In today’s post, I’ll show you how to swag your light fixture so it will hang exactly where you want it to.
**Note: Affiliate links may be used in this post. I may receive a small commission at no extra cost to you. Full details at the bottom of the post.
Table of Contents
- How to Swag a Ceiling Fixture That Hangs From a Chain
- How to Swag a Ceiling Light Without a Chain
- How to Swag a Light from an Electrical Outlet in the Wall
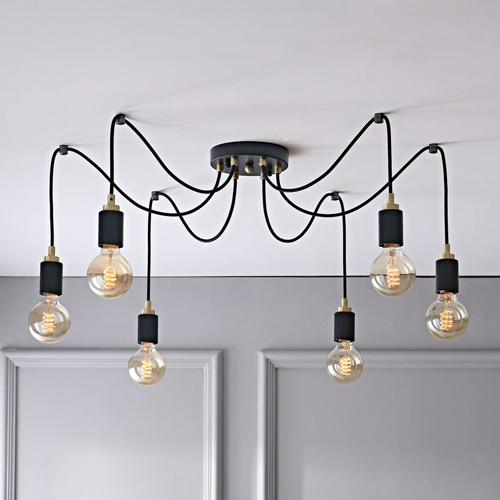
How To Swag a Ceiling Fixture That Hangs From a Chain
Materials Needed:
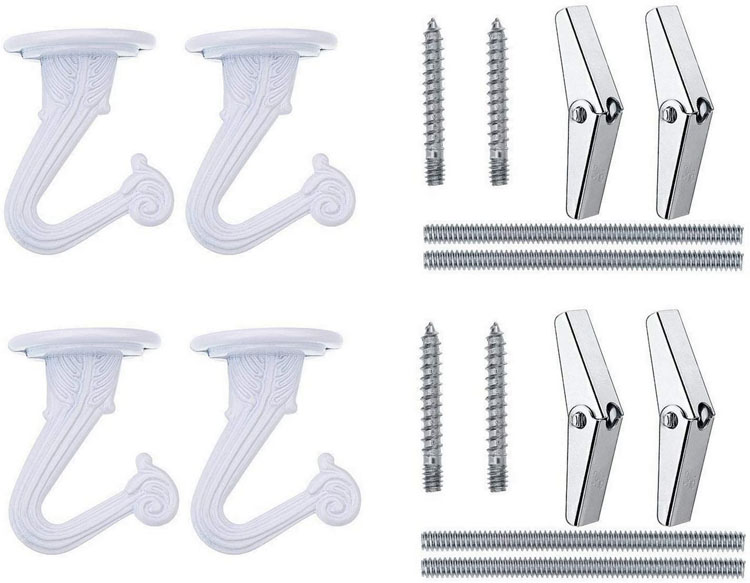
- Swag Kit
- Extra Chain Links (optional)
- Drill
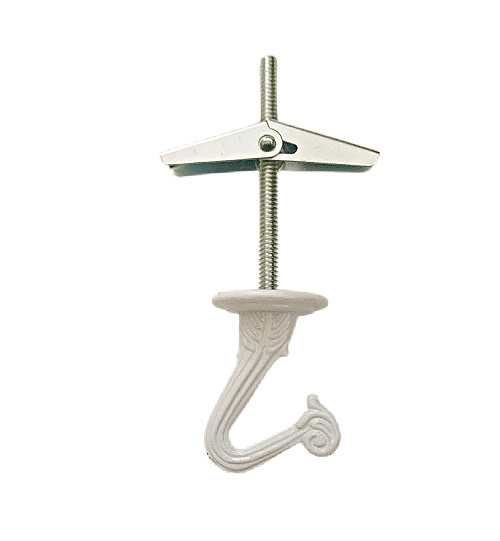
Swag Kit
You’ll need a swag kit that contains a screw, a toggle bolt, and a ceiling hook. You can buy each item separately but I found it easier to buy the kit.
Step 1 – Determine Where the Fixture Should Hang
- If you swag the fixture to the center of the room, the bottom of the chandelier or pendant light should hang 7′ from the floor.
- If you swag the fixture over a kitchen table, dining table, or island, the bottom should hang 30-36″ above the surface of the table.
Step 2 – Calculate the Amount of Cord/Chain You’ll Need
- After you figure out where you’d like your swag chandelier to hang, hold the light up to the ceiling by its chain at the appropriate height. Mark the spot on the ceiling with a pencil and note the amount of chain you’ll need.
- Make sure your electricity is off. Grab the remaining chain. Loop it to the electrical box in the ceiling and again make note of how much chain you need.
- You’ll want to leave plenty of chain for a large loop. A chain that doesn’t dip enough will look awkward hanging from your ceiling.
- Check to see that you have enough wire for your electrician to install the fixture in the ceiling.
- Click HERE if you need extra chain.
Step 3 – Wire Your Chandelier to the Ceiling
- It’s always best to use a professional when dealing with electricity
Pendant Light Swag Kits


Need replacement parts for your swag light? Here are some nice replacement kits.
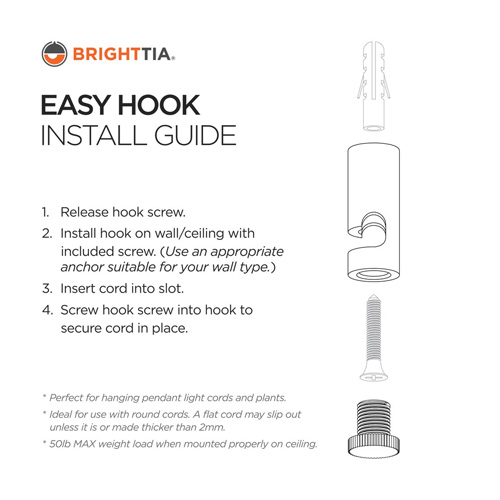
Step 4 – Install Your Swag Hook to the Ceiling
- Locate your pencil mark on the ceiling. If there is a ceiling joist where you’ll hang the fixture, you can use a swag hook with a pointed tip screw to twist into the ceiling. Be sure to check the weight limit of the hook.
- More than likely though, you’ll have hollow drywall to work with and you’ll need to install a toggle bolt to accommodate the weight of your chandelier.
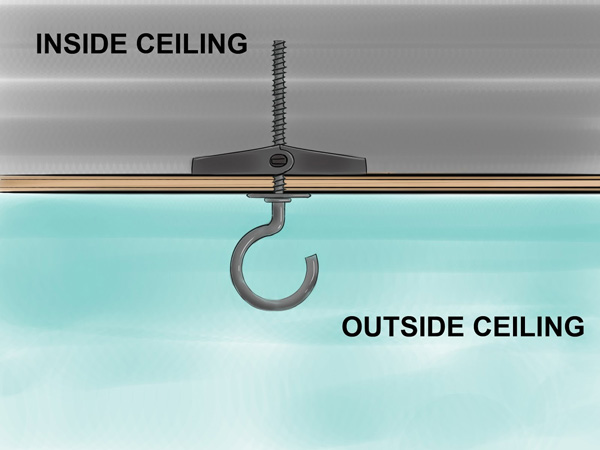
Step 5 – Install Toggle Bolt in Drywall Ceiling
- Put your goggles on.
- Drill a small hole (starter hole) on your marked spot in the ceiling with a small bit.
- Drill the final hole through the drywall using a bit that is the same diameter as the butterfly nut when it’s pinched together (approximately 1/2″).
- Assemble the toggle bolt by screwing the bolt into the butterfly nut on one end and screwing the swag hook onto the other end.
- Push the butterfly nut and bolt through the hole in the ceiling. Use the swag hook as a turn-key. For leverage, pull down the swag hook slightly and twist clockwise until it screws in flush with the ceiling.
Step 6 – Swag Your Light Fixture
- Swag the chandelier from the ceiling junction box over to its new location. Place the chain on the swag hook making sure the fixture hangs at the appropriate height.
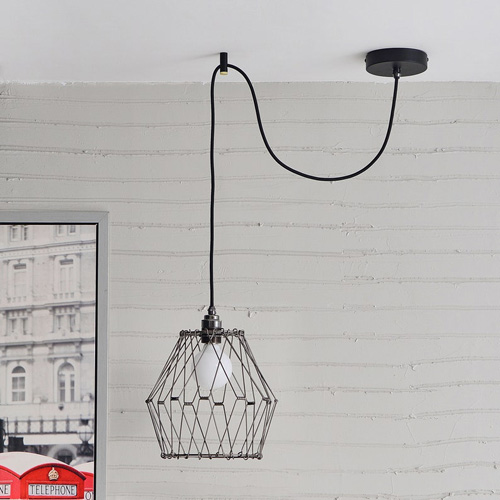
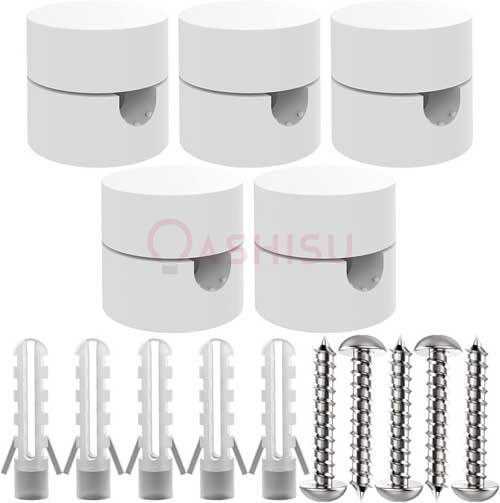
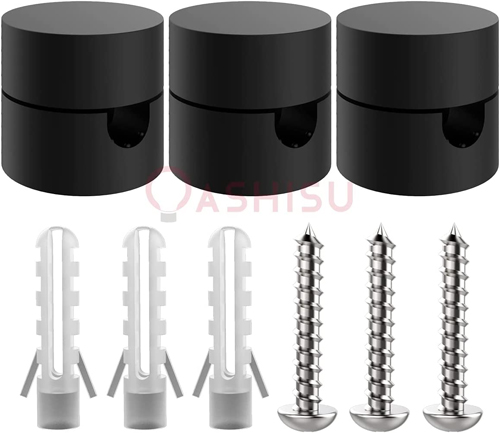
How To Swag a Ceiling Light Without a Chain
Materials Needed:
- Swag Light Ceiling Hooks or Swag Mounts White or Swag Mounts Black
- Drill
- Goggles
Step 1 – Determine Where the Fixture Should Hang
- If you swag the fixture to the center of the room, the bottom of the chandelier or hanging light should hang 7′ from the floor.
- If you swag the fixture over a dining room table (kitchen island), the bottom should hang 30-36″ above the surface of the table.
Step 2 – Calculate the Amount of Cord You’ll Need
- After you figure out where you’d like your fixture to hang, hold the light up to the ceiling by its cord at the appropriate height. Mark the spot on the ceiling with a pencil and note the amount of lamp cord you’ll need.
- Make sure your electricity is off. Grab the remaining cord. Loop it to the electrical box in the ceiling and again make note of how much lamp cord you need.
Step 3 – Wire Your Light Fixture to the Ceiling
- It’s always best to use a professional when dealing with electricity.
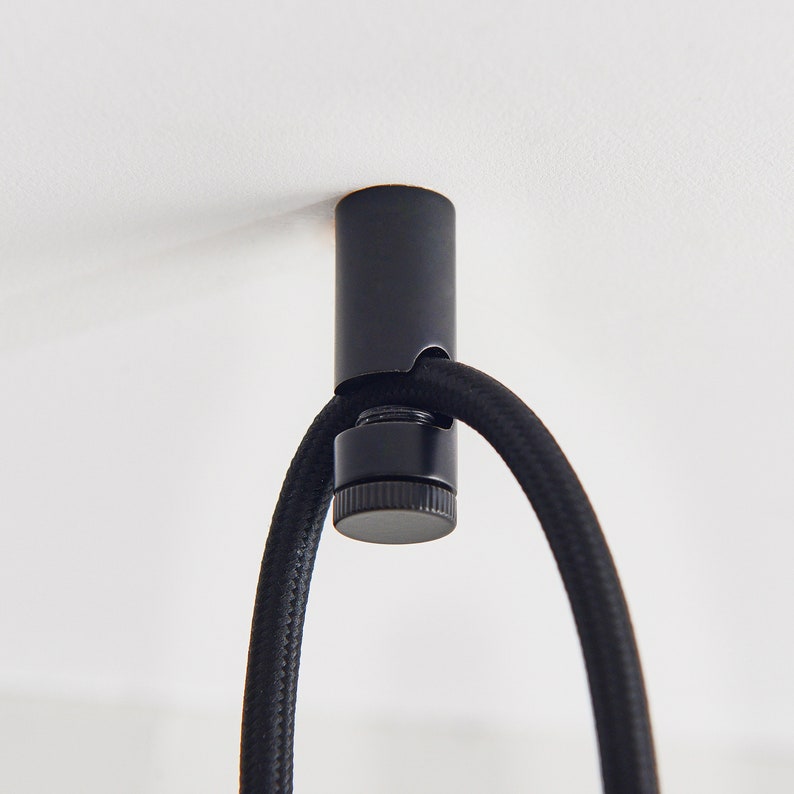
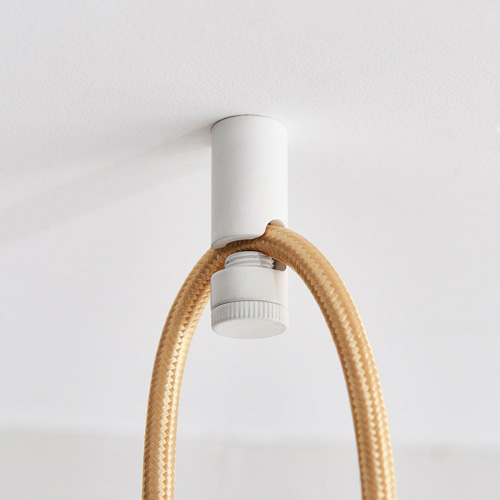
Step 4 – Install the Ceiling Mounts
- Put your goggles on.
- Drill a hole in the ceiling just slightly larger than the molly bolt.
- Push the provided silver screw through the ceiling mount. Fit the screw into the molly bolt and screw until the mount lies flush with the ceiling.
- You can use one or more ceiling mounts to swag your pendant fixture.
Step 5 – Swag Your Fixture to the Ceiling Mount
- Swag your light fixture from the ceiling junction box over to the ceiling mount.
- Place the cord on the ceiling mount hook and adjust the fixture to the desired length. Secure the screw against the cord to hold the cord in place.
- Screw your light bulb in the fixture and you’re all set.
How To Swag a Light Fixture From an Electrical Outlet in the Wall
Step 1 – Determine Where the Fixture Should Hang
- If you want to hang the fixture in the center of the room, the bottom of the chandelier or pendant light should hang 7′ from the floor.
- If you hang the fixture over a table (kitchen island), the bottom should hang 30-36″ above the surface of the table.
Step 2 – Install the Ceiling Mounts to the Ceiling
- After you figure out where you’d like your fixture to hang, hold the light up to the ceiling by its cord at the appropriate height. Mark the spot on the ceiling with a pencil.
- You’ll use two or more ceiling mounts according to your preference. The first should be installed in the ceiling directly overhead. The next mount should go on the ceiling directly above the electrical outlet, next to the wall.
- If there is a long stretch from the fixture to the wall, you may need to install an extra ceiling mount.
- Wearing your goggles, locate your pencil mark on the ceiling. Once done, drill a hole in the ceiling just slightly larger than the molly bolt.
- Push the screw through the ceiling mount. Fit the screw into the molly bolt and screw until the mount lies flush with the ceiling. (Refer to diagram above).
Step 3 – Swag Your Fixture to the Ceiling Mounts
- Place the cord on the ceiling mount hook and adjust the fixture to the desired length. Secure the screw against the cord to hold it in place.
- Swag the remaining cord over to the ceiling mount next to the wall. Place the cord on the ceiling mount hook. Secure the screw against the cord to hold it in place.
- Guide the electrical cord down and plug it into the wall outlet.
If you’re on the lookout for some beautiful chandeliers to add to your home, you can check out my post on Buying Timeless Vintage Tole Chandeliers: All-Inclusive Guide and 50 Best Modern Farmhouse Chandeliers (2023).
Now that you know how to swag a light fixture – you can see how easy it is. Let me know if you need help. I love hearing from you!
Until Next Time,
Cherie
Oh, and one last note – the geeky lighting side of me wants you to know that “swag” can be used in two ways. Either way is acceptable.
- Swag – used as a verb: swag your light fixture from hook to hook.
- or Swag – to describe light fixtures: swag lights, swag pendants, swag lamps or swag chandeliers.
Let me know if you need any other geeky lighting facts, I have all kinds!
Here are some Related Articles I thought you may be interested in:
27 Best Kitchen Light Fixtures for Low Ceilings
50 Best Modern Farmhouse Chandeliers and Lighting
Shop the 60 Best Pendant Lighting Fixtures
Creative Ideas for Lighting a Room Without Ceiling Lights
What To Do With Old Light Fixtures – Should I Sell, Trash, or Donate?
Disclosure
Please note that some links in this post are affiliate links. At NO ADDITIONAL COST TO YOU, I will earn a small commission on any purchases made.