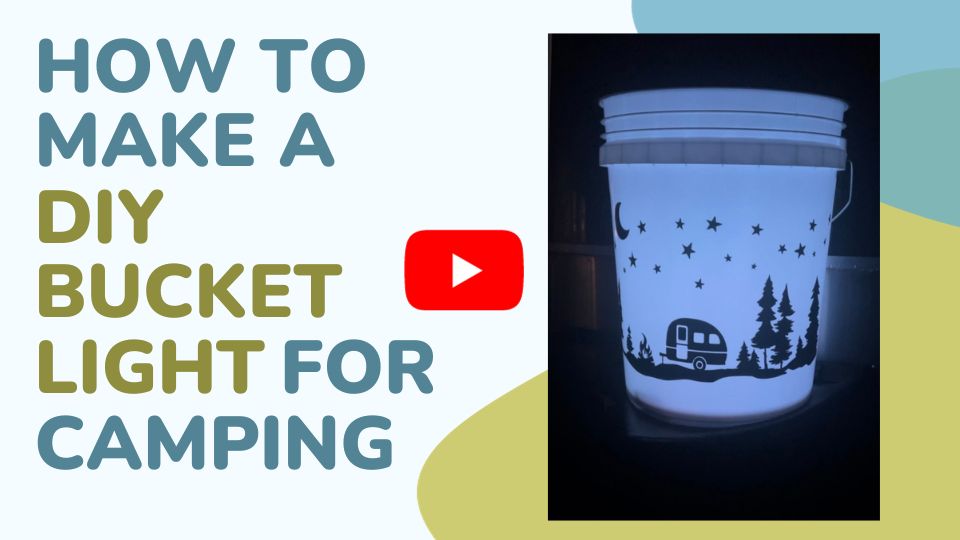
How To Make A DIY Camping Bucket Light
Whipping up your own camping bucket light is a super fun and wallet-friendly diy project that lets you give your camping gear a personal twist.

These cool outdoor lights can amp up the vibe for the camping season, for your RV adventures or any outdoor space. In this blog post I’ll guide you on how to make your very own camping bucket light fixture with the perfect soft light glow. Check out the video tutorial below.
The latest on YOUTUBE:
Camping Bucket Light Materials List
Here are the Items You’ll Need to Make Your DIY Bucket Light
(Affiliate links are used in this post. I may receive a small commission at no extra cost to you).
What Kind of Bucket Do I Use and Where Do I Purchase It?
You can find a white 5-gallon bucket in most any hardware store like Ace Hardware or home improvement stores like Home Depot, Lowe’s, and Amazon.
While some stores carry the buckets with a matching lid, most do not. You may have to purchase the bucket lid separately. No big deal though, lids cost less than $2.
Where Can I Find a Vinyl Decal?
I opted to buy my vinyl transfer from Etsy. You can see it below. I chose a camping scene. I think it’s so cute. This made the perfect addition to our camping space. Click the photo for the exact decal or click here to see more Etsy decals.

Etsy also offers decals that can be customized with names and dates. If you have a Cricut cutting machine, you can customize your own design. I don’t have a Cricut so I went for the ready-made decal but wow those things are cool. Click here for Cricut design elements.
What Size Should My Decal Be?
I wanted my decal to cover the whole side of the bucket so I chose a vinyl that was 8″ tall by 17″ wide. I wanted to leave about a 1.5″ blank area above and below the decal for the best look. Decal size depends on your preference, to me, the larger decals look best.
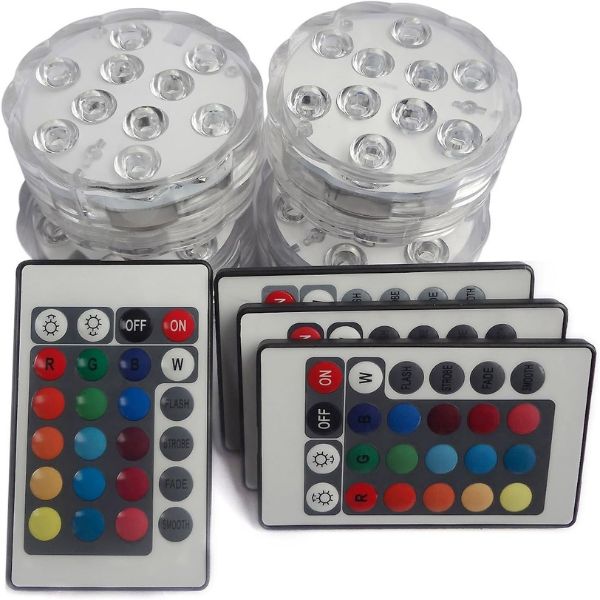
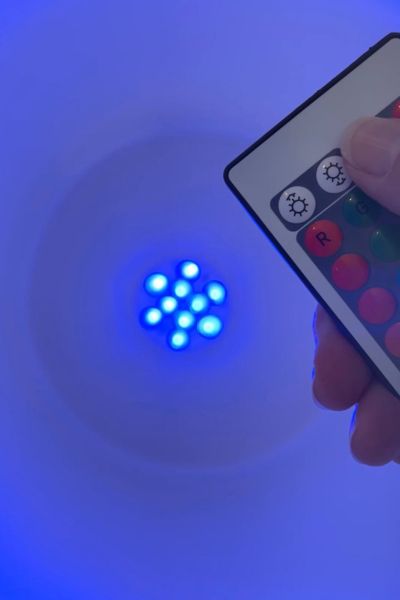
Where Do I Find LED Puck Lights?
As I mentioned in the materials list, you’ll need puck lights for this DIY. I picked mine up on Amazon (click the photo below for details). Or, you can go to a retail store like Lowe’s or Home Depot. Most packs come with remote controls so you can control the lights from a certain distance.
Assembly
STEP 1: Prep Your Bucket
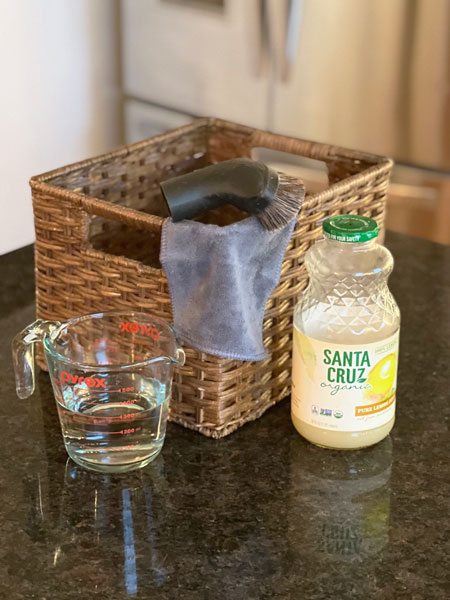
The first step is to prep your bucket. When you purchase your bucket, it may come with several stickers on it. You’ll need to remove those first. This can get tedious especially if the stickers rip or leave a sticky residue. Goo Gone works great to remove sticky adhesive.
Quick Tip
If there are stickers on your bucket that refuse to come off, grab your hair dryer and give the stickers a blast of heat for a few seconds. Be careful though, too much heat will melt the bucket. The heat should release the adhesive allowing you to peel the stickers right off with no hassle!

I didn’t want to order my bucket online because I wanted to use it for our upcoming trip over the weekend. I initially went to Walmart and the shelf was bare- they were sold out. Eventually I found one at Home Depot. I thought the design on the side of the bucket was a sticker but when I got home, I found out it was actually printed – ugh!
The only thing I could do was to sand the design off. I thought it was going to be a pain but actually the design sanded off quickly and easily. The area where I sanded feels rough but it didn’t compromise the bucket to where the light wouldn’t shine through.
STEP 2: Transfer Your Vinyl Design
Dab some rubbing alcohol on a rag and run this over the front of the bucket, where you’ll adhere the decal, making sure it dries thoroughly. This should clean the surface nicely.
Once you have your bucket cleaned, prepped, and ready, carefully position the decal on the surface (bucket front area). Put masking tape on the center top and bottom of the decal attaching it to the bucket to hold it in place.

Slowly peel the top clear sheet (transfer tape) that holds the decal, separating it from the white backing. Work from left to the center. When you reach the masking tape in the middle, cut the paper backing off of the left side. Remove the top and bottom tape. Make sure the decal doesn’t touch the surface. Then roll the sheet of transfer paper onto the left side of the bucket.
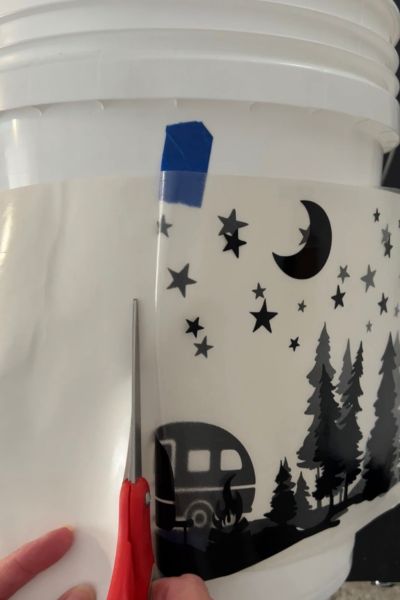
Then working from the center, peel the backing from the decal (from center to right) and roll the decal onto the right side of the bucket. Smooth out the decal with your hands or a credit card (I used a little box).
This part is not hard but is tedious. Slowly working from top left corner to the lower right, peel the clear transfer tap off of the decal. Make sure all of the decal adheres to the bucket. If you run into an area that doesn’t transfer well, lay the clear sheet back down and rub over the clear sheet/decal. The decal should come off. If it doesn’t, you may have to pull it off of the clear sheet just a bit. Once you get to the middle and have half of the clear sheet detached from the decal, cut the clear sheet off (the part that has been pulled off of the decal). Then continue to peel the remainder of the clear sheet off of the decal.
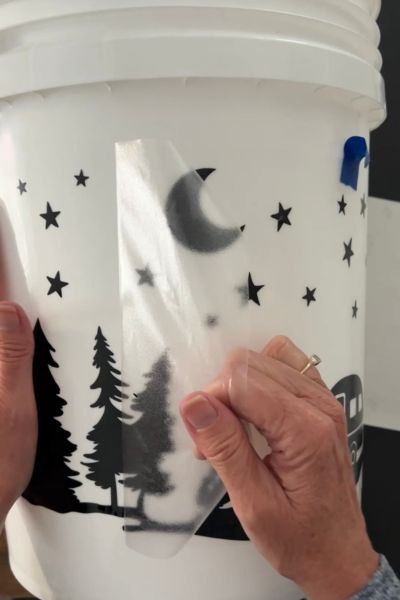
Once you have pulled all the clear sheet off, your decal should be fully in place and look really neat!
STEP 3: INSTALL YOUR PUCK LIGHTS
To install your puck LED light, you’ll need Velcro dots or strips. Stick one sticky side of the velcro strip on the inside bottom of the bucket while sticking the other sticky side on the back of the puck lights. Place the puck light velcro to velcro which will secure it to the bottom of the bucket. You can now easily remove the puck light when you need to change the batteries.
You can stop at this step. But if you’re like me and you want extra brightness and oomph for your bucket light, you can add another puck light to the bottom of the lid.
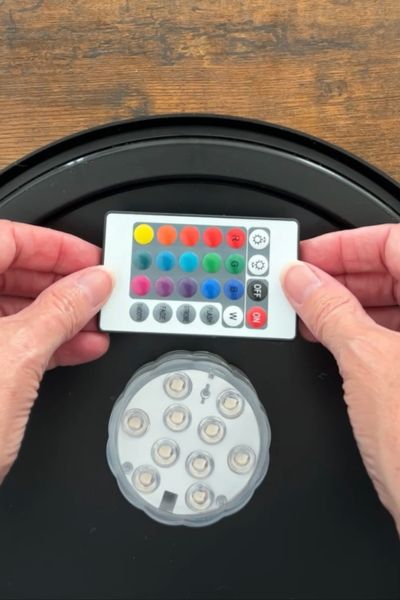
The last step is to add velcro dots or a strip to the side wall of the bucket and to the backside of the remote control. Place the remote velcro to velcro on the side strip. This will give you a secure place to keep your remote control.
You’re finished! Now another fun part is to play with your remote and experiment with different colors. My favorites are the blue and purple.
Creating your own DIY bucket lantern light for camping is a fantastic and cost-effective project that adds a personal touch to your camping gear and is a great way to enhance the ambiance of your outdoor adventures. With a few readily available materials, you can easily transform a simple bucket into a stylish and functional lighting accessory.

With your DIY bucket lamp complete, you’re all set to enjoy the outdoors. This project is a fun and accessible way to customize your camping gear, making it lots of fun and a memorable addition to your next camping trip, or RV adventure.
So, why not get started? It’s time to brighten your season with a fun bucket light.
Until Next Time,
Cherie